
 |
Upper Mississippi River Restoration ProgramLong Term Resource Monitoring |
|
| |
||
Land Cover/Use Data - KMZ
Creating and Displaying Spatial Data Using Google Earth Pro
Google Earth and Google Earth Pro (GEP) are ubiquitous and freely available geographic information systems (GIS). Each allow you to view imagery, measure distances, and get location coordinates for anyplace on the earth’s surface. Current options allow you to:
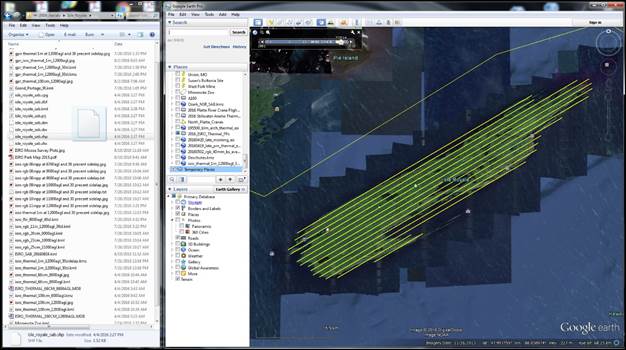
This Help Page will describe the methodology for displaying text-based spatial data (data that are referenced to the earth’s surface) or creating spatial data for use with either version of Google Earth. Once created, data can be easily shared with anyone else using either the standard or Pro version. Often, data in one of the supported formats can be dragged-and-dropped directly from a file manager into the GEP window where the data’s properties (attributes, colors, and representation) can be adjusted and resaved as a KMZ/KML file. Figure 2 shows a shapefile of a study area boundary being dragged-and-dropped into a GEP view of the same area of interest already containing aerial imagery flight lines. |
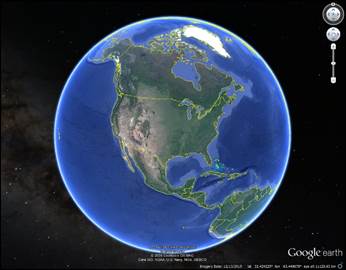
Figure 1. Google Earth Pro is a computer program used to view remotely sensed imagery (satellite, aerial, and terrestrial) referenced to the earth. |
|
|
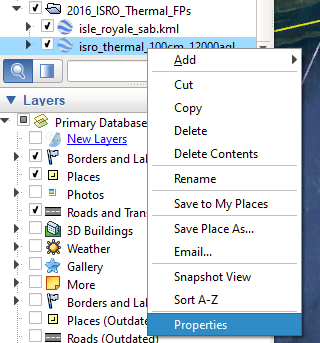
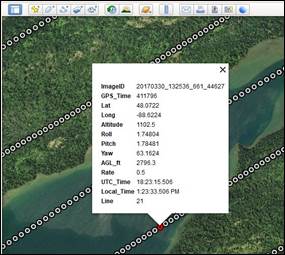
Viewing Data in GEP Data imported into GEP may be displayed in multiple ways; a default template (Figure 3) is applied unless the user creates a specific style or selected one from a previously generated template. Display properties can be accessed by right clicking the newly added file and selecting Properties. The Properties dialog box allows the user to change the appearance of the selected file, including line widths and colors, icon types, sizes, and colors, add a description, and whether the file is extruded (meaning elevated) above the surface or clamped to the ground (Figure 4.). The latter option is often better for display purposes. The Properties menu can also be accessed from the Edit menu in the left corner of the main display window. Once the file is displayed as desired, right-click the file again and select “Save Place as…” to save that file as a new KMZ or KML file with the new display properties. This also ensures that anyone receiving the newly created file will see the same properties. |
Figure 3. Once imported, the user can display data by creating a new style template or by using a previously created template. |
There is also an option to “Save to My Places” for frequently used files. These files will be saved in the GEP My Places window for easy access. The file itself is saved to the user’s computer in the C:\Users\-your username-\AppData\LocalLow\Google\GoogleEarth folder and in a master file called “myplaces.kml” that contains all files saved in this manner. The same right-click menu allows the user to delete this file from the master file by selecting “Delete” once it is no longer needed. However, it is a good practice to save any file you may want to use again to a separate project folder using the “Save Place as…” option. Data Conversion As noted earlier in the shapefile example, any of the GEP-supported formats can be opened by either dragging the file to GEP’s main display window or by navigating to the desired file using the main menu’s File -> Open option. One of the most common data conversions is text-based coordinate data, often in a .csv (comma-delimited) or .txt or .tab (tab-delimited) format. GEP requires basic field header info such as Description or Identification, Latitude, and Longitude to properly display these types of files on the landscape. Add these fields using a text editor or spreadsheet program as needed. Spreadsheet programs may also be used to add or include fields using formulas. In Figure 5 below, formulae were used to calculate Universal Time Coordinated (UTC), local time, altitude above ground level (AGL) in feet, and frame rate. Export data from spreadsheets as a text file in either the comma- or tab-delimited format. |
Figure 4. The Properties dialog provides access to multiple file display options.
|
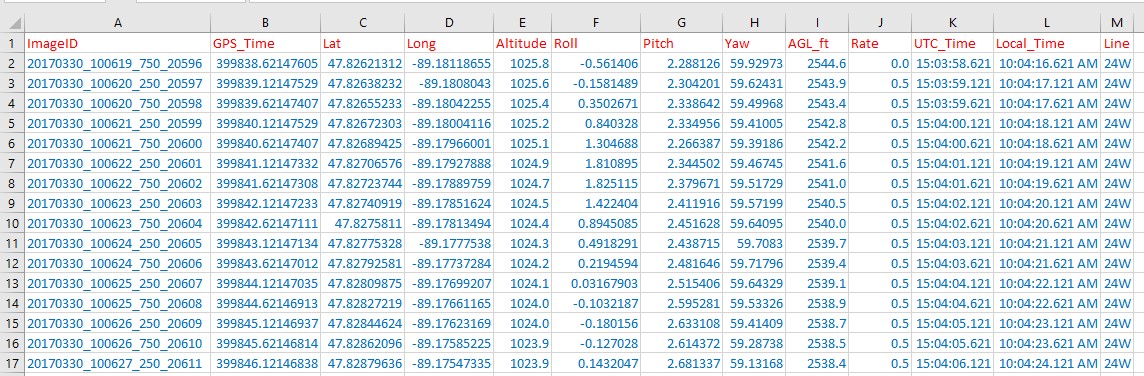 Figure 5. An example of delimited aerial imagery metadata file displayed in a spreadsheet. |
|
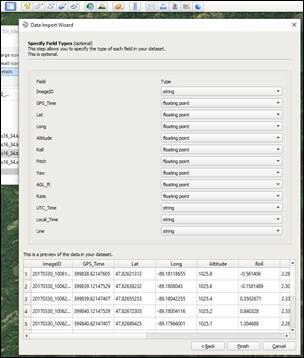
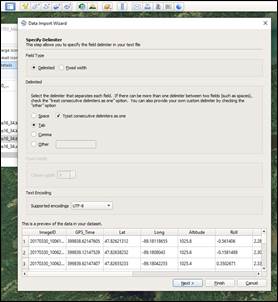
Data in text format may be dragged-and-dropped onto GEP’s main window. GEP will recognize the data as text and open the Data Import Wizard (Figure 6). Confirm that the data are recognized (comma delimited, tab, others) and displayed correctly (proper field headings and values). Once these settings are verified, click Next. The Data Import Wizard then asks for confirmation of latitude and longitude fields. Verify and click Next. The next dialog, Specify File Types, assigns the type of field values used (string, if text, and either integer or floating point, if numbers). Verify these settings are correct and click Finish to complete the import (Figure 7).
|
Figure 6. Using the Google Earth’s Data Import Wizard to import text-based location data |
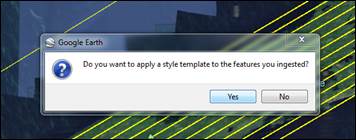
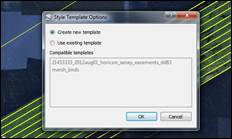
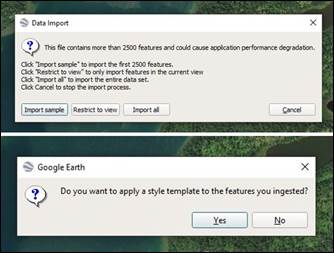
If the Data Import Wizard detects more than 2,500 features, it will ask if you want to import only the data within the current view or the entire data set. Select the desired import option to complete the data import process. As with the shapefile example above, either a previously created template can be selected, or a new template can be created by clicking Yes. This example clicked No to display the data using the default template (Figure 8).
|
|

Page Last Modified: August 15, 2022